What may appear to be an innocuous speck of sand to one person can be a substantial bother for a new car owner. That’s exactly why engineers at Ford Motor Company are working with an advanced scanning technology to improve vehicle quality.
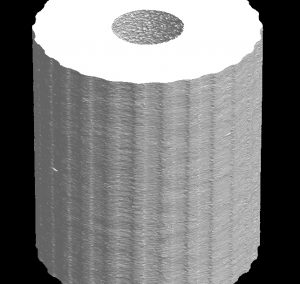
Toilet paper? Hardly... Ford uses CT scans to detect problems with parts before assembling them into a finished vehicle - such as this microscopic view of a brake hose.
The sophisticated technology in question is the same computer tomography (CT) scanner used by the police and hospitals. Ford engineers use the scanner – a Skyscan Micro-CT unit that fits on a table-top – to help check for internal and structural deficiencies of vehicle parts, including gears, latches, welds, nuts, bolts, fasteners, and sensors – before they are assembled into a finished car.
Imperfections such as air pockets, indentations, and blemishes – all of which could mean the difference between acceptable and optimal quality – can be detected. If a supplier makes a change to the way it manufactures or assembles a part, Ford’s “forensic investigators” – as they’re known internally – can create a short, three-dimensional video from the data collected by the CT scanner and check whether the change has lead to an improvement in the quality and performance of the part. The scanner is capable of detecting defects down to 17 microns – smaller than a single particle of sand – or one-fifth the diameter of a human hair. This means that problems not visible to the naked eye can now be seen on the computer screen. The goal of the procedure is to find problems before they turn into customer-reported issues.
Before implementing the scanning practice, each component needed to be taken apart by hand in order to be studied – a process that’s not only extremely time consuming, but also very tedious:
“We’d spend hours sanding it a little, polishing it a little, examining it under a microscope and then take a picture of it, repeating this process several times,” said Vlad Beltran – a Ford analyst. “Even then it was possible that we could go right through a defect and not even know it.” With the scanner, many issues can be found and solved within a few short hours.
What happens when an issue is found and identified by the scanning procedure? The findings are given to the proper people to fix the problem… in this case, it’s the materials engineering group that works with designers and a supplier base to resolve the issue and/or correct the situation.
The Motrolix Take
Needless to say, this is awesome… on many levels. Ford is driving quality to a point that has been unheard-of in the mainstream automotive space – and the numbers are living proof that it’s working. How’s that for Total Quality Management (TQM)? Manufacturing geeks, feel free to chime in!









No Comments yet